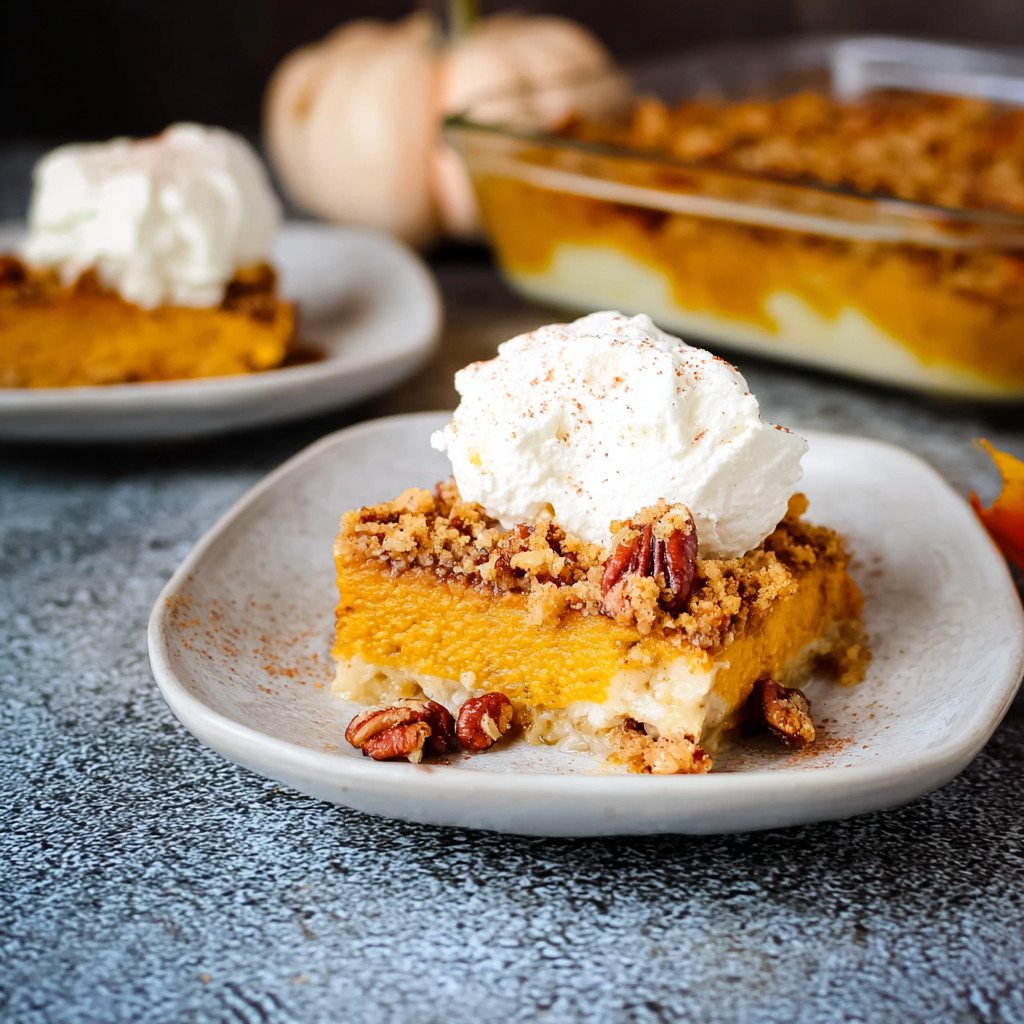
How to Make the Perfect Pumpkin Crisp
Making a delicious pumpkin crisp is easier than you might think! With just a few simple steps, you can create a dessert that will impress your family and friends. Let me walk you through the process, ensuring you capture all the rich flavors and textures that make this dish a true Thanksgiving delight.
Step 1 – Prep Your Ingredients Quickly
Before diving into the mixing, I always find it helpful to have all my ingredients prepped and ready to go. This not only saves time but also makes the cooking process smoother. Gather your pumpkin, evaporated milk, sugar, cinnamon, eggs, cake mix, pecans, and butter. Trust me, having everything at your fingertips will make you feel like a kitchen pro!
Step 2 – Begin Cooking
Now, let’s get mixing! In a large bowl, combine the two cans of pumpkin, 21 oz of evaporated milk, 1 cup of granulated sugar, 1/2 tsp of cinnamon, and 3 large eggs. As you whisk these ingredients together, the creamy pumpkin base will start to come together, filling your kitchen with a warm, inviting aroma. It’s like a hug in a bowl!
Step 3 – Combine Ingredients and Cook
Once your pumpkin mixture is smooth, pour it into a 9x13x2 inch baking pan lined with parchment paper. This makes for easy cleanup later! Next, sprinkle the dry yellow cake mix evenly over the pumpkin layer, followed by the chopped pecans. The crunch of the pecans adds a delightful texture that contrasts beautifully with the creamy base. Finally, drizzle the melted butter over the top, ensuring every bit of cake mix is moistened.
Step 4 – Final Touches & Serving Suggestions
Now it’s time to bake! Place your pan in a preheated oven at 350 degrees F and let it bake for 50-60 minutes. You’ll know it’s done when the top is golden brown and a toothpick inserted in the center comes out clean. Once baked, allow the pumpkin crisp to cool slightly before inverting it onto a platter. This step is crucial for achieving that perfect presentation! After it cools completely, mix together the cream cheese, powdered sugar, and whipped topping, then spread it generously over the top. Your pumpkin crisp is now ready to be enjoyed!
Introduction to Pumpkin Crisp
As the leaves turn golden and the air becomes crisp, I can’t help but think of one of my favorite Thanksgiving desserts: pumpkin crisp. This delightful dish combines the rich, creamy essence of pumpkin with a crunchy topping that’s simply irresistible. It’s like a warm hug on a chilly day, perfect for sharing with family and friends during the holiday season.
What I love most about pumpkin crisp is its ability to bring comfort and joy to any gathering without requiring hours of slaving away in the kitchen. The creamy pumpkin base, infused with warm spices, pairs beautifully with the crunchy cake mix and pecans on top. It’s a dessert that not only satisfies your sweet tooth but also adds a festive touch to your table. Plus, it’s incredibly easy to prepare, making it an ideal choice for busy holiday schedules.
So, whether you’re hosting a large family dinner or simply looking to indulge in a seasonal treat, pumpkin crisp is sure to be a hit. Let’s dive into this delicious recipe and make your Thanksgiving celebration even more special!
Why You’ll Love This Delicious Low-Carb Pumpkin Crisp Recipe
When it comes to holiday desserts, convenience is key, especially for busy individuals like us. This low-carb pumpkin crisp recipe is not only quick to prepare but also bakes in just about an hour. With minimal hands-on time, you can focus on other Thanksgiving preparations while your kitchen fills with the warm, inviting aroma of pumpkin and spices.
The rich flavors of this pumpkin crisp are what truly set it apart. Imagine the creamy pumpkin base, perfectly spiced with cinnamon, harmonizing with the crunchy topping of cake mix and pecans. Each bite offers a delightful contrast between the smooth, velvety pumpkin and the satisfying crunch of the topping. It’s a flavor experience that will have your guests coming back for seconds!
What I appreciate most about this recipe is its simplicity. Whether you’re a novice baker or a seasoned pro, you’ll find this dish easy to whip up. The straightforward steps and readily available ingredients make it accessible for everyone. Plus, the end result is a stunning dessert that looks as good as it tastes, making it a perfect centerpiece for your Thanksgiving table.
Ingredients You’ll Need for This Recipe
To create this delightful pumpkin crisp, you’ll need a handful of essential ingredients that come together to form a deliciously creamy and crunchy dessert. Here’s what you’ll need:
- 2 cans pumpkin (15 oz each) – This serves as the creamy base, providing that rich pumpkin flavor we all love.
- 21 oz evaporated milk – Adds a luscious richness that enhances the overall texture of the dish.
- 1 cup granulated sugar – Sweetens the mixture, balancing the flavors beautifully.
- 1/2 tsp cinnamon – A warm spice that elevates the pumpkin flavor and adds a cozy aroma.
- 3 large eggs – Binds the mixture together, ensuring a smooth consistency.
- 1 box yellow cake mix (15.25 oz) – This forms the crunchy topping that contrasts perfectly with the creamy pumpkin.
- 1 cup chopped pecans – Adds delightful texture and a nutty flavor that complements the dish.
- 2 sticks melted butter – Provides moisture and richness, making the topping irresistibly delicious.
- Topping: 1 oz cream cheese, 8 oz whipped topping, 1/2 cup powdered sugar – This creamy finish brings everything together, making each bite a heavenly experience.
Don’t worry about jotting down these measurements just yet; I’ll provide the exact amounts at the end of the recipe for easy printing. Let’s get ready to whip up this scrumptious pumpkin crisp!
How to Make the Perfect Pumpkin Crisp
Making a delicious pumpkin crisp is easier than you might think! With just a few simple steps, you can create a dessert that will impress your family and friends. Let me walk you through the process, ensuring you capture all the rich flavors and textures that make this dish a true Thanksgiving delight.
Step 1 – Prep Your Ingredients Quickly
Before diving into the mixing, I always find it helpful to have all my ingredients prepped and ready to go. This not only saves time but also makes the cooking process smoother. Gather your pumpkin, evaporated milk, sugar, cinnamon, eggs, cake mix, pecans, and butter. Trust me, having everything at your fingertips will make you feel like a kitchen pro!
Step 2 – Begin Cooking
Now, let’s get mixing! In a large bowl, combine the two cans of pumpkin, 21 oz of evaporated milk, 1 cup of granulated sugar, 1/2 tsp of cinnamon, and 3 large eggs. As you whisk these ingredients together, the creamy pumpkin base will start to come together, filling your kitchen with a warm, inviting aroma. It’s like a hug in a bowl!
Step 3 – Combine Ingredients and Cook
Once your pumpkin mixture is smooth, pour it into a 9x13x2 inch baking pan lined with parchment paper. This makes for easy cleanup later! Next, sprinkle the dry yellow cake mix evenly over the pumpkin layer, followed by the chopped pecans. The crunch of the pecans adds a delightful texture that contrasts beautifully with the creamy base. Finally, drizzle the melted butter over the top, ensuring every bit of cake mix is moistened.
Step 4 – Final Touches & Serving Suggestions
Now it’s time to bake! Place your pan in a preheated oven at 350 degrees F and let it bake for 50-60 minutes. You’ll know it’s done when the top is golden brown and a toothpick inserted in the center comes out clean. Once baked, allow the pumpkin crisp to cool slightly before inverting it onto a platter. This step is crucial for achieving that perfect presentation! After it cools completely, mix together the cream cheese, powdered sugar, and whipped topping, then spread it generously over the top. Your pumpkin crisp is now ready to be enjoyed!
Expert Tips to Ensure Keto Cooking Success
As a passionate home cook, I’ve learned a few tricks along the way to ensure that my pumpkin crisp turns out perfectly every time. Here are some expert tips to help you achieve the best results with this delightful dessert:
- Use fresh pumpkin puree for enhanced flavor: While canned pumpkin is convenient, nothing beats the rich, vibrant taste of fresh pumpkin puree. If you have the time, roast a sugar pumpkin, scoop out the flesh, and blend it until smooth. Your pumpkin crisp will have a depth of flavor that will impress everyone!
- Adjust sugar levels for personal taste preferences: The beauty of this recipe is its flexibility. If you prefer a less sweet dessert, feel free to reduce the amount of granulated sugar. You can also experiment with sugar substitutes like erythritol or monk fruit sweetener to keep it keto-friendly while still satisfying your sweet tooth.
- Ensure even baking by checking with a toothpick: To avoid any surprises, I always recommend checking for doneness with a toothpick. Insert it into the center of the pumpkin crisp; if it comes out clean, your dessert is ready. This simple step ensures that your pumpkin crisp is perfectly baked and not undercooked.
By following these tips, you’ll not only enhance the flavor of your pumpkin crisp but also make the baking process smoother and more enjoyable. Happy baking!
Essential Kitchen Tools for This Pumpkin Crisp Recipe
To whip up this delightful pumpkin crisp, having the right kitchen tools on hand can make all the difference. Here’s a list of essential tools you’ll need:
- 9x13x2 inch baking pan: This is the perfect size for baking your pumpkin crisp, allowing it to cook evenly and develop that beautiful golden top.
- Mixing bowls: A couple of mixing bowls in different sizes will help you combine your ingredients without any mess.
- Whisk: A sturdy whisk is essential for blending the pumpkin mixture smoothly, ensuring all the ingredients are well incorporated.
- Parchment paper: Lining your baking pan with parchment paper makes for easy cleanup and helps prevent sticking.
- Measuring cups and spoons: Accurate measurements are key to achieving the perfect balance of flavors, so have these handy!
If you don’t have a 9×13 inch pan, you can use two smaller baking dishes or even a round cake pan. Just keep an eye on the baking time, as it may vary slightly. Happy baking!
Delicious Variations to Customize Your Pumpkin Crisp
One of the best things about pumpkin crisp is its versatility! You can easily customize this delightful dessert to suit your taste preferences or dietary needs. Here are some delicious variations to consider:
- Add chocolate chips for a sweet twist: If you’re a chocolate lover like me, consider folding in a cup of semi-sweet or dark chocolate chips into the pumpkin mixture. The rich chocolate flavor pairs beautifully with the creamy pumpkin, creating a decadent dessert that will have everyone asking for the recipe!
- Substitute gluten-free cake mix for a gluten-free option: For those following a gluten-free diet, simply swap out the regular yellow cake mix for a gluten-free version. This way, you can enjoy the same delicious flavors and textures without compromising on dietary restrictions.
- Incorporate spices like nutmeg or ginger for added warmth: While cinnamon is a classic choice, don’t hesitate to experiment with other warm spices. A pinch of nutmeg or ground ginger can elevate the flavor profile of your pumpkin crisp, adding a cozy, aromatic touch that’s perfect for the fall season.
Feel free to mix and match these variations to create your own signature pumpkin crisp. The possibilities are endless, and each twist will make this beloved dessert even more special!
Best Keto-Friendly Sides & Beverage Pairings
When it comes to enjoying your pumpkin crisp, pairing it with the right sides and beverages can elevate your Thanksgiving experience. Here are some easy, keto-friendly options that complement the rich flavors of this delightful dessert:
- Whipped cream or keto-friendly ice cream: A dollop of freshly whipped cream or a scoop of keto-friendly ice cream can add a creamy contrast to the warm pumpkin crisp. Look for sugar-free options to keep it low-carb while still indulging in a sweet treat.
- Spiced chai or herbal teas: The warm spices in a cup of spiced chai or a soothing herbal tea can enhance the cozy flavors of your pumpkin crisp. These beverages not only provide a comforting experience but also help balance the sweetness of the dessert.
- Roasted vegetables as a side dish: For a savory touch, consider serving roasted vegetables alongside your pumpkin crisp. Seasonal veggies like Brussels sprouts, cauliflower, or zucchini, tossed in olive oil and herbs, make for a delicious and nutritious complement to the sweetness of the dessert.
These pairings not only enhance the overall meal but also keep your Thanksgiving feast aligned with your keto lifestyle. Enjoy the delightful combination of flavors and textures as you celebrate the season!
FAQs About Making Pumpkin Crisp at Home
As you prepare to make your delicious pumpkin crisp, you might have a few questions. Here are some common queries I’ve encountered, along with concise answers to help you navigate the process smoothly:
- Can I use fresh pumpkin instead of canned? Absolutely! Fresh pumpkin can add a wonderful depth of flavor to your pumpkin crisp. Just make sure to roast and puree the pumpkin until smooth before using it in the recipe. It’s a bit more work, but the taste is worth it!
- How do I store leftovers? If you have any leftovers (which is rare, but it happens!), store them in an airtight container in the refrigerator. The pumpkin crisp will keep well for about 3-4 days. Just be sure to let it cool completely before sealing it up to maintain its texture.
- Can I make this dessert ahead of time? Yes, you can! Pumpkin crisp is a great make-ahead dessert. You can prepare it a day in advance and store it in the refrigerator. Just add the cream cheese topping right before serving to keep it fresh and fluffy.
These tips should help you feel more confident as you embark on your pumpkin crisp journey. Enjoy the process and the delightful results!
Final Thoughts on This Easy Keto-Friendly Pumpkin Crisp
As I reflect on the joy of Thanksgiving, I can’t help but think about the warmth and love that comes from sharing delicious food with family and friends. This easy keto-friendly pumpkin crisp is more than just a dessert; it’s a celebration of the season, a way to create lasting memories around the table. The creamy pumpkin base, combined with the crunchy topping, brings a delightful contrast that everyone will enjoy.
I encourage you to try this recipe and make it your own. Whether you stick to the classic version or add your unique twist, I promise it will be a hit at your holiday gathering. Don’t forget to share your experiences and any variations you come up with! I love hearing from fellow home cooks and seeing how this pumpkin crisp brings joy to your Thanksgiving celebrations. Let’s spread the love of cooking and create a community of delicious memories together!
Print
Pumpkin Crisp: A Must-Try Thanksgiving Delight!
- Total Time: 4 Hr
- Yield: 8 servings 1x
- Diet: Vegetarian
Description
A delicious pumpkin crisp recipe perfect for Thanksgiving, featuring a creamy pumpkin base topped with a crunchy cake mix and pecans.
Ingredients
- 2 cans pumpkin (15 oz each)
- 21 oz evaporated milk
- 1 cup granulated sugar
- 1/2 tsp cinnamon
- 3 large eggs
- 1 box yellow cake mix (15.25 oz)
- 1 cup chopped pecans
- 2 sticks melted butter
- TOPPING: 1 oz cream cheese
- 8 oz whipped topping
- 1/2 cup powdered sugar
Instructions
- Preheat oven to 350 degrees F. Mix pumpkin, milk, sugar, cinnamon, and eggs.
- Pour mixture into a 9x13x2 pan lined with parchment paper.
- Crumble dry cake mix over pumpkin mixture. Sprinkle with crumbled nuts.
- Pour melted butter over the top.
- Bake at 350 degrees for 50-60 minutes. Once baked, cool slightly and turn onto a platter, removing the parchment paper.
- When cooled, mix the cream cheese, powdered sugar, and whipped topping.
- Spread the topping over the sides and top. Store in the refrigerator.
Notes
- Allow the dessert to cool so it sets before flipping.
- If you don’t have a big serving dish, invert this onto a cutting board or baking sheet.
- Prep Time: 3 Hr
- Cook Time: 1 Hr
- Category: Dessert
- Method: Baking
- Cuisine: American
Nutrition
- Serving Size: 1 serving
- Calories: Approximately 350
- Sugar: Varies
- Sodium: Varies
- Fat: Varies
- Saturated Fat: Varies
- Unsaturated Fat: Varies
- Trans Fat: Varies
- Carbohydrates: Varies
- Fiber: Varies
- Protein: Varies
- Cholesterol: Varies

